One of the most underrated visual features in AutoCAD is gradient hatch.
On creating quick representations or illustrations for conveying a concept in sketch, instead of having an inceptive reliance on a full feature overblown 3D design software package, this nifty feature of gradient hatch could often come in handy for small scale and expeditious illustrations.
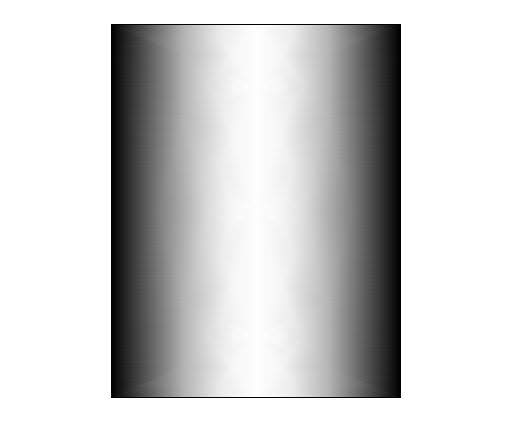
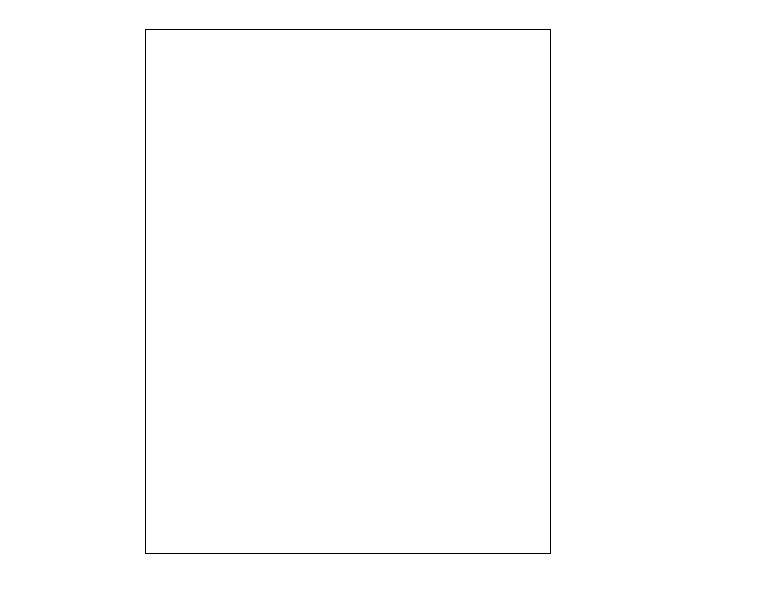
For example, to give a 3D feel to a cylindrical section, we can apply gradient hatch to a vertical rectangle. I shall demonstrate it with a simple example below. The first step is to draw a simple rectangle.
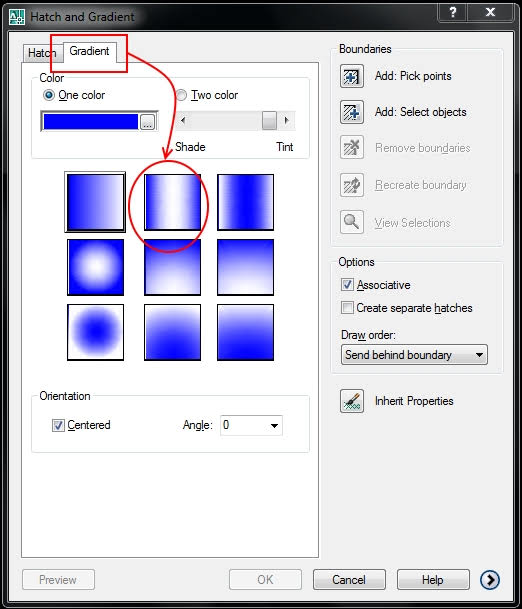
Next, we need to give it a gradient hatch in order to give that 3D pipe-like cylindrical appearance. Type in command ‘h‘ on the AutoCAD command line to open the hatch settings panel. Go to the Gradient tab. Here, we have a choice to go for either one color or two color option. Personally, I prefer a two-color palette in order to customize it well.
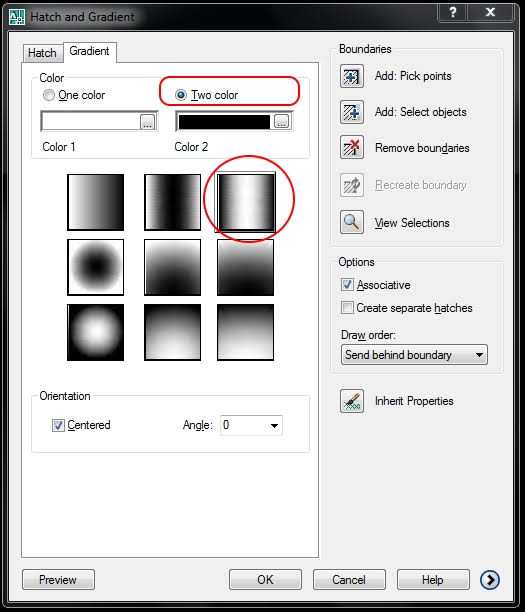
Select Two Color from the Gradient tab. For the best professional appearance, I recommend using only blacks and whites instead of any flashy colors. Here, you have to be careful to use the white color at the centre and as it widens to the centre, it gradually turns to black. For that, use the first color as pure white and the second color as pure black and select the option as shown below.
So in a minute, we have this below appearance.
I’m aware that an advanced 3D program like Solidworks, for example, can give much better visual appearances. However, for a very quick and nifty solution on a program like AutoCAD which is much more universal in its reach across industries, I hope this turns out to be much more useful.